- Jh123x: Blog, Code, Fun and everything in between./
- My Blog Posts and Stories/
- Migrating the Website to Hugo/
Migrating the Website to Hugo
Table of Contents
After some thinking and a lot of procrastination. I decided to migrate my website to Hugo.
Why the change? #
There were a few reasons for this change.
- My current website is serving static content with a django backend that does not need to be there.
- The internet connection for Starhub sucks recently and I do not want the website to take up too much bandwidth.
- I am not the type of back up data regularly, thus I shall just be lazy and leave it to someone else (EG: Github).
So Why not make use of frontend or other tools (like hugo) to serve the content that I want to serve?
The website will be faster, more responsive while not taking up too much bandwidth.
Why Hugo? #
There was 2 reasons why I went with Hugo.
1. I love to type in Markdown #
When I first started working on projects in Github, I went to look at other repositories and looked at all the pretty stuff that people did on github in markdown.
After fiddling with it a bit, I had decided that I should learn how to write markdown and use it to write some form of documentation on the project.
Ever since then, I tend to write many things in markdown and have been using it ever since.
2. I want my website to look pretty #
Hugo provides a wide variety of themes that can be selected and used. The screenshot below shows some examples of the themes that can be used.
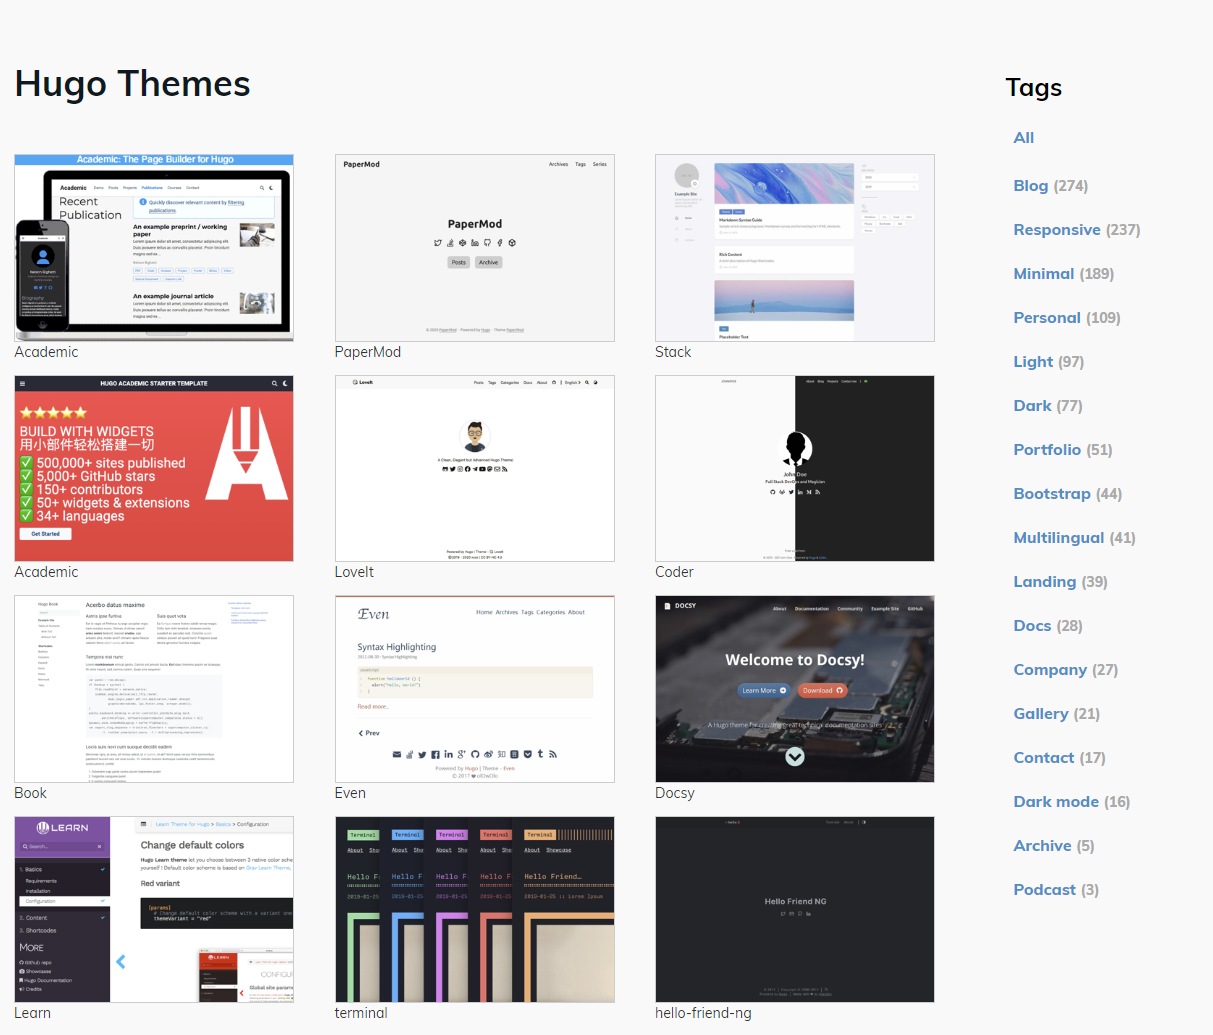
I mean just look at it, it has a large variety of themes and I can pick and choose whatever I want :D. Looking Pretty and clean.
To look at the themes yourself, you can go to hugo themes
3. I do not want to host it on my house computer anymore #
The recent outages from Starhub made me realize that I should not take the internet connection in my home for granted.
Nearing the outages, the speed of the internet connection will be so slow that the website starts to show ERROR 522 meaning that connection has timed out. This will happen either while fetching the webpage, or while getting the resources to load the website.
That, combined with the fact that I do not like to backup my website, means that I should not host it on my house computer and offload it to some other (free) platform (IE: Github pages / Netlify).
Before the jump to hugo #
Before the jump to Hugo, there were some tradeoffs that I considered as well.
1. Lack of backend functions #
Jumping to hugo will mean that there will be a lack of backend functions (IE: Quiz, polls, anything that require db/state).
Given that my website did not really contain any of such contents so far, I think it is safe to say that I can transit to hugo.
Event if there was a use case for it next time, I can link it using a subdomain to another website which contains the backend and let the user use it from there.
2. Hassle to setup #
There was also a consideration that I was a very big hassle to set up.
Initially, there was a mind barrier that I had when it came to setting up the website. I thought that it will take forever and that the website might not even function correctly out of the box.
After actually diving into it, I realize that it is not as hard as it seems and my previous website was already completed in markdown anyways. So migrating over is literally just copy and pasting the blog posts from the database into markdown files for the Hugo server to render for me.
Now what? #
Now that I have migrated the website to hugo, you will notice a huge improvement in the design and may even come to read my blog post more often.
For the nerdier people, I will be showing you how to setup and deploy hugo below.
How to create my own hugo website? #
As I am coding this on a Windows Based machine, I will mainly be using the Windows version of the installation. For the full instructions, feel free to visit their Official Website where they mainly go through the instructions for Mac and Linux.
Step 0: Getting the requirements to install hugo #
In this tutorial I will be using Chocolatey for windows to install Hugo on my machine.
To setup Chocolatey ensure that you are using an administrative shell - you can also install as a non-admin, check out Non-Administrative Installation. Install with powershell.exe
With PowerShell, you must ensure Get-ExecutionPolicy is not Restricted. We suggest using Bypass to bypass the policy to get things installed or AllSigned for quite a bit more security.
Run
Get-ExecutionPolicy. If it returnsRestricted, then runSet-ExecutionPolicy AllSignedorSet-ExecutionPolicy Bypass -Scope Process. Now run the following command:
Set-ExecutionPolicy Bypass -Scope Process -Force; [System.Net.ServicePointManager]::SecurityProtocol = [System.Net.ServicePointManager]::SecurityProtocol -bor 3072; iex ((New-Object System.Net.WebClient).DownloadString('https://community.chocolatey.org/install.ps1'))
Paste the copied text into your shell and press Enter.
Wait a few seconds for the command to complete.
If you don’t see any errors, you are ready to use Chocolatey! Type choco or choco -? now, or see Getting Started for usage instructions.
The instructions above are an excerpt from their official website
Step 1: Choose a theme that you want #
Before we start on which version of hugo to install, you must first select a theme that you want to use.
Some themes require the basic version of hugo while some others require the extended version of hugo in order to work.
In this version I will be using the congo theme which uses the basic version of hugo.
Step 1: Installing Hugo #
After installing Chocolately in Step 0, run the following command
choco install hugo -confirm
Now that you have hugo installed, you can check the version by running
hugo version
If you see something like this it means that hugo is installed successfully.
hugo v0.101.0-466fa43c16709b4483689930a4f9ac8add5c9f66 windows/amd64 BuildDate=2022-06-16T07:09:16Z VendorInfo=gohugoio
Step 2: Creating the hugo files #
To create a template for hugo to work with, run the following command
hugo new site <name of directory>
This should create a new website with the directory name that you have specified.
Step 3: Adding the theme to your site #
Now to add the theme.
If you are already in a git directory, feel free to skip this step below. Otherwise, run the command below to turn your folder into a git directory.
git init
Now add the theme as a submodule inside the theme folder using
git submodule add <url of theme to be added>
This should clone the theme into your /themes folder. Now add the theme to your hugo config file.
theme = "congo"
Step 4: Adding some content to the website #
Now you can add content to the website using
hugo new blog/<name of blog post>
This will create a new markdown file that you can edit. It will look something like this
---
<!--This part is the meta data-->
title: "My First Post"
date: 2019-03-26T08:47:11+01:00
draft: true
---

<!-- This is the contents of the actual post. -->
The meta data will vary from theme to theme so do make sure to look at the documentation of the theme.
Step 5: Running the hugo server #
Now that you have added your items, you can start the server and see it come to life.
hugo server -D
It should be running on localhost:1313. Visit the url there to view the links.
Step 6: Hosting the files #
I have decided to use github for hosting the files and netlify to actually deploy the files to the site.
To actually run the file on netlify, you will have to provide a netlify.toml config file so that netlify knows what to use. A sample of the file is shown below.
[build]
publish = "public"
command = "hugo --gc --minify"

[context.production.environment]
HUGO_VERSION = "0.101.0"
HUGO_ENV = "production"
HUGO_ENABLEGITINFO = "true"

[context.split1]
command = "hugo --gc --minify --enableGitInfo"

[context.split1.environment]
HUGO_VERSION = "0.101.0"
HUGO_ENV = "production"

[context.deploy-preview]
command = "hugo --gc --minify --buildFuture -b $DEPLOY_PRIME_URL"

[context.deploy-preview.environment]
HUGO_VERSION = "0.101.0"

[context.branch-deploy]
command = "hugo --gc --minify -b $DEPLOY_PRIME_URL"

[context.branch-deploy.environment]
HUGO_VERSION = "0.101.0"

[context.next.environment]
HUGO_ENABLEGITINFO = "true"

[[redirects]]
from = "/npmjs/*"
to = "/npmjs/"
status = 200
You can just copy and paste it over to your github repo but make sure to update the hugo version to the one that you are using.
After you are done, upload the file to github and deploy it on netlify as per usual.
Special Sauce for congo #
If you want to join me and use congo, please make sure to read the documentation