- Jh123x: Blog, Code, Fun and everything in between./
- My Blog Posts and Stories/
- Expanding VM Disk space in Proxmox running Ubuntu/
Expanding VM Disk space in Proxmox running Ubuntu
Table of Contents
Introduction #
In this post, we will go through the steps to increase the disk space of your Proxmox Virtual Machines (VM).
There are 2 main parts:
- Expanding the Disk size of the VM
- Resizing the File system in Ubuntu to make full use of the space.
Part 1: Expanding the Size of the VM in Proxmox #
Step 1: Login to Proxmox #

Key in your username and password into the login page and click on the “Login” button.
Step 2: Click on your desired VM #
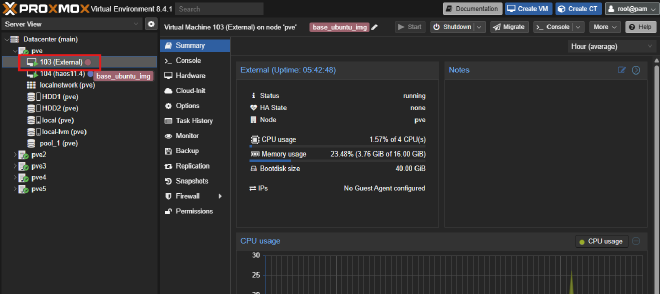
Click on the VM that you want to expand.
Step 3: Click on the Hardware and Select the Harddisk to expand #
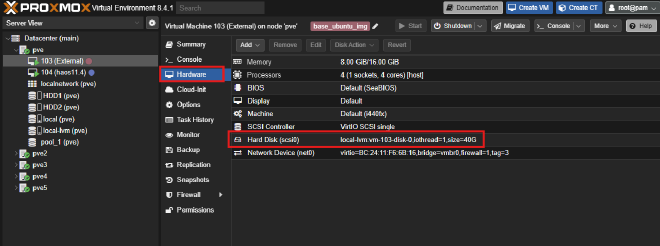
Select the disk that you want to expand.
Step 4: Resize the Disk #
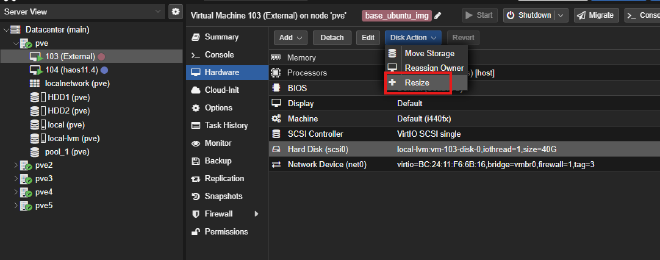
Click on resize to add more space to the disk.
Step 5: Choose amount of space to add #
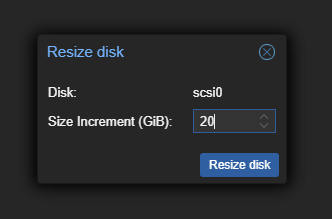
Key in the space that you want to add and click on resize disk.
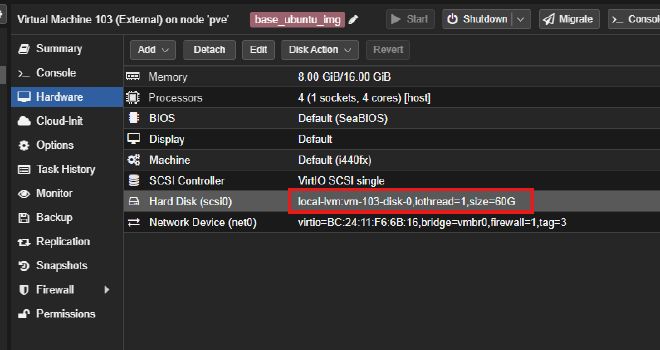
The new disk size should show up correctly after a refresh.
This is all the steps we have to do on the Proxmox side. We will now have to extend the disk size within our VM.
Part 2: Expanding the file system of the Ubuntu Virtual Machine #
Step 1: Checking if the space is detected #
Run this command below to see if the additional disk space is detected
fdisk -l
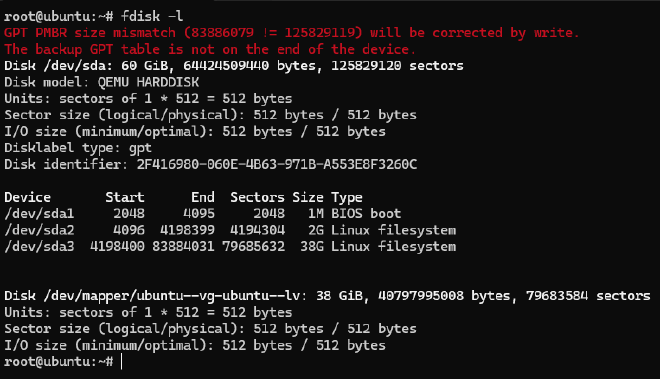
As you can see it displays the disk as having 60Gb
Step 2: Expanding the Physical Volume #
growpart /dev/sda 3
Now we will need to grow the partition from 38 GB currently to the full space using the command above
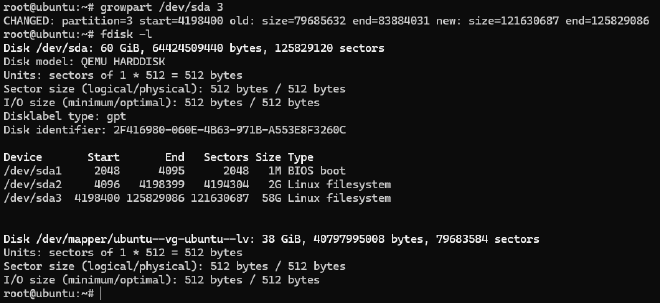
After we entered the command, we should see that the /dev/sda3 partition is now 58G instead of 38G.
Step 3: Resize Physical Volume #
sudo pvresize /dev/sda3

This command updates the physical volume for our /dev/sda3 partition
Step 4: Extending our logical volume #
After updating our physical volume, we can now extend our logical volume
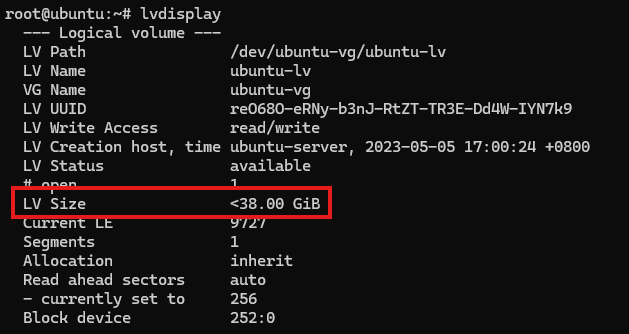
lvextend -l +100%FREE /dev/ubuntu-vg/ubuntu-lv
Run this command to expand the space in our logical volume
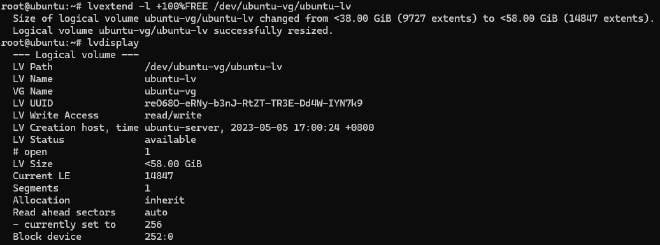
After running the command, we should be able to see that our lv size is now <58GiB.s
Step 5: Resize the file system #
After extending our logical volume, we can now extend our file system to make use of all the space.
resize2fs /dev/ubuntu-vg/ubuntu-lv
This command will resize the file system to match the size of the logical volume that we have earlier.

After running successfully, we can now verify that the disk space is indeed available nows

We can now see that the final disk space available is increased.
Conclusion #
In this article, we went through how to increase the disk size of a Proxmox Virtual machine running Ubuntu, from extending the disk space in proxmox to making use of the disk space in the file system within the virtual machine itself.
Stay tuned for more home lab related posts.